If you want to add digital glitch effects to your text or logo then After Effects is the perfect place to do it. As a video manipulation program, creating digital distortions comes easy, and there are plenty of different techniques to choose from – all using After Effects’ built-in effects.
Quick Links: Tutorial Text | Instant Glitch Overlays | More Glitch Tutorials
In this video tutorial Avnish Parker shows how to add the glitch effect using a displacement map. Full, step-by-step text instructions can also be found below the video.
Step 1: Setting Up the Composition
- Open Adobe After Effects (get a free trial here).
- Create a new composition by going to Composition > New Composition. Name it “Glitch Logo Animation.”
- Use the following settings: 1920×1080 resolution, 30 frames per second. You can choose your own settings if needed.
Step 2: Create the Background
- Create a new solid by going to Layer > New > Solid. Choose a dark color for the background.
- Import your logo and place it above the background layer.
Step 3: Logo Animation
- Animate the logo: Go to around 3 seconds in the timeline.
- Select the logo layer and press “S” to open the scale property. Add a keyframe.
- Go to the first frame and increase the scale value so that your logo covers the entire screen.
- Press “T” to open the opacity property. Set its value to 0% and add a keyframe.
- Go to around 1 second and change the opacity value to 100%.
- Select all keyframes, right-click, and choose “Keyframe Assistant” > “Easy Ease” (or press F9).
Step 4: Creating a Glitch Effect
- Create a new solid and name it “Glitch.” You can choose any color.
- Right-click on the Glitch layer and choose “Pre-compose.” Name it “Glitch Comp” and make sure to select “Move all attributes into the new composition.”
- Open the “Glitch Comp.”
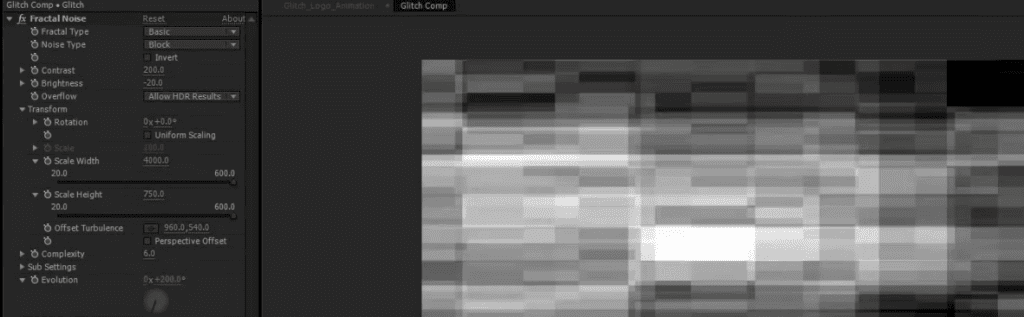
- Select the “Glitch” layer and go to the “Effects & Presets” panel. Search for “Fractal Noise” and apply it.
- Adjust the Fractal Noise settings:
- Noise Type: Block
- Contrast: 200
- Brightness: -20
- Open the “Transform” options and uncheck “Uniform Scaling.”
- Change “Scale Width” to 4000 and “Scale Height” to 750.
- Alt/Option-click the Evolution stop-watch to add the expression “time*3000”.
Step 5: Adding Displacement
- Switch back to the main composition.
- Precompose the “Logo” layer by right-clicking it and choosing “Pre-compose”. Name it “Logo Comp” and select “Move all attributes into the new composition.”
- Hide the “Glitch Comp” layer.
- Create a new adjustment layer above the “Logo Comp” and name it “Glitch Effect.”
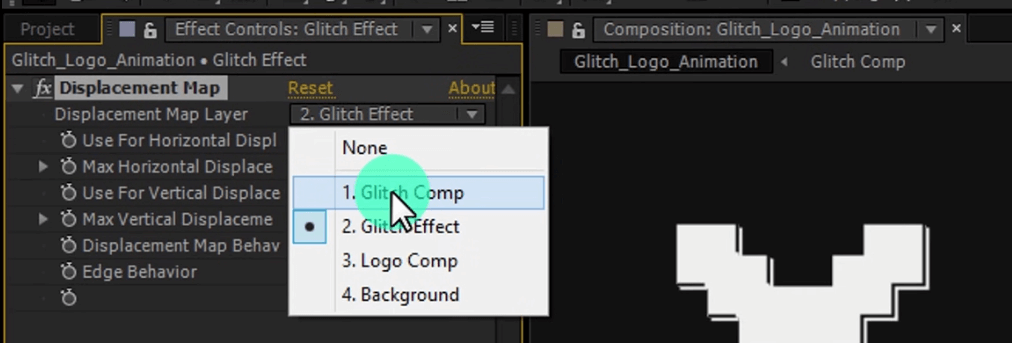
- Go to the “Effects & Presets” panel and search for “Displacement Map”. Apply it to the “Glitch Effect” layer.
- In the “Effect Controls” panel, set “Displacement Map Layer” to “Glitch Comp” layer.
- Set “Max Horizontal Displace” to 173 and “Max Vertical Displace” to 96.
Step 6: Create Multiple Glitches

- Duplicate the “Glitch Effect” layer by selecting it and pressing “Ctrl + D.”
- Trim a small portion (about 5-6 frames) and delete the top and bottom layers.
- Duplicate this trimmed layer, change its timing and glitch settings to create variations.
- Repeat the duplication process as desired.
Step 7: Add an Old TV Effect
- Create a new adjustment layer and name it “Bad Signals.”
- Search for the “Bad TV 2” effect in the “Effects & Presets” panel and apply it to the “Bad Signals” layer.
- Adjust the “Wave Width” and “Wave Height” settings to ‘2’.
Step 8: Create RGB Split Effect (Optional)
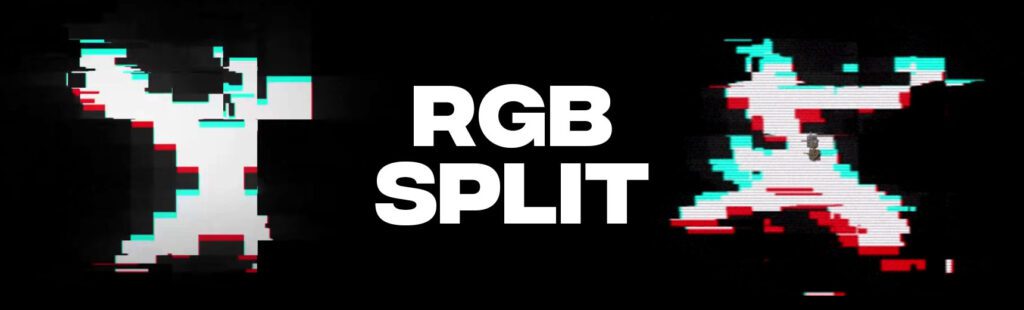
- Duplicate the “Logo” layer.
- Rename the duplicates as “Logo Comp Red,” “Logo Comp Blue,” and “Logo Comp Green.”
- Change the blending mode of all three layers to “Screen”.
- Apply the “Fill” effect to all layers, setting their colors to red, blue, and green.
- Animate the position of the top “Logo” layer to create an RGB split effect.
Step 9: Add Secondary Text
- Add your text using a font of your choice.
- Position the text at the top of the composition.
- Apply the “Random Fade Up” animation effect to the text layer.
- Adjust the timing of the animation keyframes.
- Select all keyframes and apply “Easy Ease” (F9).
Step 10: Create a Vignette
- Create a new solid layer and name it “Light.” Set the color to black.
- Use the ellipse tool to create a mask, change the mask type to subtract, and add feathering.
Your glitch logo animation is complete! You can further adjust the timing and effects as needed for your project.
Need instant glitch effects?
Our Mega Glitch Pack features a host of digital and analogue glitch effect overlays which you can place over text or footage in seconds, creating an instant glitchy style.
Click here to find out more about our Mega Glitch Pack.
More Glitch Effect Tutorials
Not glitched out just yet? Here are some more popular glitch effect tutorial videos to inspire you.